| General Discussion Undecided where to post - do it here. |
| Reply to Thread New Thread |
 12-19-2007, 05:03 PM
|
#1 |
|
|
I was hoping to have this completed and stickied here well in advance of christmas but just in case anyone is planning a last minute purchase or waiting for possible january sales i posted it anyway. This wasnt exactly the easiest copy and paste from one forum to another so im not sure on how well its going to turn out format
wise [xmastongue] Over the past few weeks I have been slowly adding to this in word as I think of what I would best like this thread to contain. If you are a beginner I highly recommend that you read all of this! On a personal note I would like to say that astronomy is without a doubt the most awe inspiring hobby I know of. A little taste of the universe is open to all beginner and amateur gazers alike. Obviously much more is open to professionals with funding etc. but that’s beside the point. The universe however is rich with colour, sadly because our eyes don’t work the same way as camera exposures do for example, you wont be seeing full colour vista’s, directly from your eyepiece. That’s the territory of astrophotography. The most famous telescope is in orbit above our planet, it is called the Hubble Space Telescope (HST), if you have any interest in space you have seen some of its images. Where to start: Get yourself a pair of binoculars; you will commonly see binoculars being states as for example 10x50, 20x100. These numbers mean; times magnification and the diameter of the objective lenses, so for a 10x50 pair they are capable of 10 times magnification (or 10x) and have 50mm Objective lenses. 10x50 is a good starting point for a first pair of binoculars as they can be found cheaply and have adequate light gathering ability due to the 50mm lenses for a 10 times magnification. 10x50 spec aren’t exactly astronomical binoculars but they are a very nice cheap companion to have. It is very important that you don’t buy a pair with a silly spec, by this I mean for example 10x20. As the aperture of the lenses will more often than not allow sufficient light to accommodate a 10x magnification, for distant objects. A good way to choose will be to look at what kind of magnification you want, and then multiply that by at least a factor of 5, in some cases 4.5. For a practical ratio between magnification and size, the diameter shouldn’t be divisible by more than 5 by its magnification. For example a 15x150 would be silly. 15/150 = its divisible by 10. With a lens diameter of 150mm a pair could easily focus with 30x magnification. Since you traditionally hold binoculars in your hands the bigger ones with higher magnification can be very unsteady to look through, high powered binoculars tend to come with optional tripod mounts which can alleviate unwanted shaking for better stability. When using binoculars for astronomy purposes its always best to fix on one position at a time for even up to a minute (or longer) as opposed to just panning very quickly around the sky. Now that you have your binoculars, take them outside for first light and familiarize yourself with them, specifically acquaint yourself with the focuser in daylight so that you will have a good idea of when they are in focus and when they’re not for any given distance. Also pick a target to observe without the aid of the binoculars, and then once you have found something, stay centred on it and bring the binoculars up to your eyes, are you seeing what you picked out to observe? It may seem like a silly exercise but when you start observing the night sky its very easy to mistake the region of the sky you think your looking at with another region your observing through the binoculars. Its very easy to get lost this way. Use your binoculars to scan around the sky, searching for anything you would be interested in observing much closer with a telescope, and even maybe make note of it for a future observation or for when you actually get your telescope. A very important thing to note about binoculars is that you should not have a separate view for each eye, the binoculars should be adjusted so that what you see with both eyes is converging into a near single circular frame/ viewpoint. Homework: After you get your binoculars it may be more fulfilling for you to now do some homework and familiarise yourself with the night sky, for example learning the position of some constellations etc. and the path they take as the earth rotates. There are many software packages available to allow you to more easily learn the night sky. My current favourite for new comers is still the Starry Night Pro 5 package. I have the pro plus 6 version, but it’s a little bit more crowded than what I think a beginner should have to contend with. Light, light and even more light: As we all know light gives us our ability to see. The more light that gets to our eyes, the more rich, and detailed your view will be. A Telescopes only purpose is to gather as much light as possible, the part of the telescope that accomplishes this is called the optical tube assembly, it is the body of the telescope. The eyepiece is responsible for bringing light to a focus just at your eye and not at the eyepiece itself, so its important that you are close enough and looking directly into the eyepiece when viewing something. We call this eye relief. A telescope's ability to gather this light is directly related to the diameter of its objective lens or primary mirror, the total amount of light that can pass through a lens or that is reflected by its mirror is considered its Aperture. The available Aperture of your telescope will directly reflect the maximum magnification you will be able to use without overpowering. Overpowering a telescope is using too much magnification (eyepiece) for the amount of light that the telescope can practically gather. More light is more information and you need a lot of it for detail on celestial objects. Overpowering will result in you being unable to focus an image. Magnification: By rule of thumb the theoretical maximum magnification of a telescope is typically twice the aperture in mm, or 60 times per inch of aperture. In practice given that we have to contend with a turbulent (light scattering or refracting) atmosphere. You can observe this by observing a sunset for example. When the sun is close to the horizon, most of the light gets scattered as it has to travel through much more atmosphere leaving the higher wavelengths free to flow to your eye. We see red mostly because it doesn’t scatter as easily as the shorter wavelengths of light. How turbulent the atmosphere is referred to as seeing conditions. You can always tell good seeing conditions if the stars/ planets are not twinkling or seemingly flashing.Twinkle twinkle little star was more than likely written on a night with poor seeing conditions. Magnification is the result of an eyepiece paired with a telescope with a specific Focal length. Focal lengths are always specified on telescopes. The resulting magnification of an eyepiece in a telescope is the telescopes focal length divided by the eyepiece in mm. For this example I will take the Bresser Messier 102mm recently on offer from Lidl - It is a refractor and has an aperture of 102mm so we’re looking at a recommended maximum magnification of 200x. You will likely want to aim for 120-160x with it for best results depending on seeing conditions. It has a focal length of 1000mm and comes with 10mm, 15mm and 25mm Plossl eyepieces and a 2x Barlow lens, so resulting magnifications are as follows: 25mm = 40x + barlow = 80x 15mm = 66x + barlow = 132x 10mm = 100x + barlow = 200x Note: In this case the supplied 2x Barlow will double the resulting magnification Telescopes: There are 2 main types of telescope assembly’s available; they are called Refractors and Reflectors. The other type is called Catadioptric. The most popular brands are Celestron, Meade, (Bresser, is also a Meade company), Zhumell, Bushnell, Orion, Skywatcher. Nothing else is really coming to mind. Refractor: These types are what people traditionally know a telescope to be. A refractor is best used for Lunar or planetary observation. Refractors use lenses, because of this they are a lot more expensive per inch of aperture to manufacture. Basically quality big refractors will cost you a lot of money due to the amount of lenses. Refractors are more commonly associated with their high clarity and contrast. These tend to have long focal ratios like the telescope I used for the above example, its focal ratio is f/9.8. The focal ratio of a telescope is its focal length divided by its aperture for the Bresser messier 102mm above its; 1000/102 = 9.8 The focal ratio basically describes how long and wide the telescope is. It could be short and fat which will give it a short focal ratio or long and thin which will give it a long focal ratio, There is also an in-between. Most will refer to the focal ratio as the speed of the telescopes optics. The lower the f/number the faster, the lower the magnification you will want to use, the wider the field of view, and the brighter the image will be, with any given eyepiece or camera. Fast focal ratios (below f/6) which are generally best, for low power wide field observing and deep space photography. Slow focal ratios (above f/10) are usually better suited to higher power lunar, planetary, and high power mag photography. For mediums there’s an in-between and work nicely for both. Again the Bresser Messier 102mm above has a medium/slow focal ratio. Most refractors will have medium to slow focal ratios Common Refractors tend to suffer from chromatic aberration or false colours. This is an optical defect that produces a faint coloured 'halo' around bright stars and the planets for example. it becomes more visible as the aperture increases and the focal ratio decreases, although you can get achromatic refractors to reduce this effect and virtually eliminate it by getting an apochromatic refractor Illustration of a Refractor.  [/LEFT] [/LEFT]Reflectors: These are the larger telescopes and are considerably cheaper per inch of aperture in regards to refractors, because they use mirrors to reflect light inside the tube assembly. If you want the most aperture for your money these are the telescopes to go with, specifically Dobsonians. Dobsonians are regarded as huge buckets on a simple alt-azimuth mount. The smaller reflectors will more often than not come on equatorial mounts. Reflectors may not produce as clear an image as a refractor but they excel at Deep space observing because of their traditional large apertures. Because they use mirrors they are prone to light diffraction (scattering) which reduces image contrast in lunar and planetary observing. Also they can require frequent re-collimation or re-alignment of its optics though. They also suffer from coma, which is an optical defect in which stars appear triangular shaped at the edge of the field, thankfully not in the centre though. The faster the focal ratio is, the smaller the coma free field. So the slower the less coma you will be likely to experience. One of their biggest drawbacks however is their size, in relation to Dobsonians this has been remedied somewhat with Meade’s innovative introduction of what they call the Truss Lightbridge. Basically this is a telescope that can be dismantled for storage or transport and easily reassembled on site. The truss is the only part that needs dismantling, just a few screws here and there, they are not complicated. Illustration of a Newtonian Reflector. 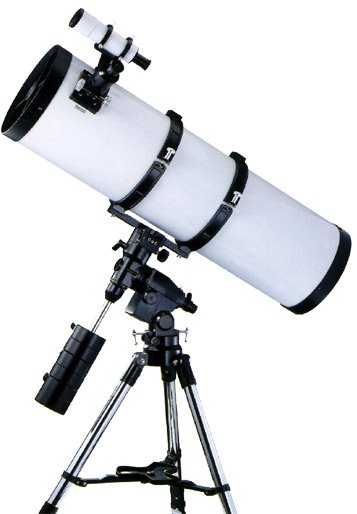 A Tradition Dobsonian  A Meade Truss Lightbridge Dobsonian.  Catadioptrics: These combine the best features of both reflectors and refractors. These are essentially large aperture telescopes with long focal lengths. They are free of chromatic aberration and coma. They will be less expensive than a refractor of similar aperture but more expensive than a reflector of the same aperture. They generally are not as bright as either, but if anything these are large portable telescopes and for that for most people who invest in the hobby they can be worth every cent. Although the larger Catadioptrics like the 16” Meade LX200R can weight 115+ kilograms and cost €10,000+. However there are smaller cheaper ones like Meade’s ETX 125 or Celestron’s Nexstar 5SE for around €600/700+ which are the same size (5”). For the same amount you can get a Dobsonian reflector that has more than twice that aperture Illustration of a Catadioptric.  [/LEFT] [/LEFT]Mounts: There are two basic types of mounts, Alt-azimuth and Equatorial. Alt-azimuth: This mount has two axes of rotation, a horizontal axis and a vertical axis. Most will be familiar with this type of mount as it’s the same as a camera’s tripod which can twist left of right and point up or down. This type of mount is not suitable for tracking, hence not suitable for astrophotography. Equatorial: This mount also has two axes of rotation but they are called right ascension and declination, this is the coordinate system for finding objects in the celestial sphere. This mount allows a telescope to be tilted at the same angle as the Earth's axis of rotation. Because of this an equatorial mount can be used to track objects and can be used for astrophotography. This is the favoured mount of choice among star gazers. The celestial co ordinate system: When I say celestial I mean the sky, we all know what the equator is, well the celestial equator for example would be that line projected onto the sky from your position looking out from earth relative to the actual equator. I tend to refer to the entire sky from the position looking out from earth as the celestial sphere. Illustration Courtesy of Meade.  [/LEFT] [/LEFT]Right Ascension (R.A.): This is measured in hours, minutes, seconds and basically refers to the ascending or rising of an object In the sky. From facing the north celestial pole stars will rise on your right Declination (Dec): This is measured in degrees and describes the angular distance of a celestial object north or south of the celestial equator.Its positive if its between the celestial equator and celestial north pole and its negative if its between the celestial equator and the celestial south pole. These may sound confusing at first but your telescope has settings circles to reflect this co-ordinate system. If you look at your telescope and look at the axis that the optical tube assembly (OTA) will revolve on, this is the axis that the OTA is balanced on. The counterweight shaft will be attached on this axis, right where the counterweight shaft is connected to the mount you will see the declination setting circle. The other is then naturally the R.A or Right Ascension setting circle Illustration I made of Dec. and R.A setting circles.  German Equatorial Mount. Go-To Drive; This is a motor driven mount which enables the telescope to give you the unique ability to just select what object you want to view. The mount will line the telescope up so you don’t need prior knowledge of where the object actually is in the sky, it does help to though. They are subject to alignment on each session. This is just a simple alignment process called 1, 2 or 3 star alignment. You just set the scope in the home position (Pointing true North) depending on which alignment option you choose it will automatically attempt to find an alignment star or 2 or 3 which will triangulate its position. you will be required to look through the telescope and centre the star accurately in the field of view for an optimal alignment. Alignment stars are basically the brightest in the sky, so knowing exactly what star to centre in on is pretty easy, some of the most famous alignment stars are: Proxycon, Vega, Capella, Sirius, Rigel, Pollux, Acturus, Antares, Mizar, Deneb, Betelguese, Regulus, Alderbaran and Alamak, there are a lot more though but these are the most familiar i would say among astronomers. What telescope is right for you?: This is really for you to decide, from the above information you should best be able to make a decision on what type of telescope you would eventually like to have and make use of. Each telescope type has its strength and weaknesses but the refractors and reflectors have different uses as mentioned above. In my case, all telescopes are right for me, they serve different purposes and having portability for some people is important, like for example if you live in a light polluted area like a city or town. It is nice to have to ability to travel and move your equipment with relative ease. I have 3 telescopes, and I have gotten much more use out of my portable than my other refractor and reflector due to ease of transport. I am referring to my Meade ETX (my on the go scope). I am more inclined to recommend a bigger reflector to a new comer as a small telescope may leave a beginner wanting and a little unsatisfied. I would therefore recommend an 8” Newtonian reflector or if bulk isn’t a problem you could pick up a 10” dobsonian reflector for maybe the same budget. Observing in the day: When you decide on and receive the telescope of your choice it is very important that you familiarise yourself with it in daylight, this will allow you to more efficiently use the telescope at night, and will avoid a lot of frustration. A telescope can also be used during the day to admire/ or observe our closest star; Sol. The proper precautions should be taken before you ever proceed to observe the sun. First buy a safe appropriate solar filter for the size of your telescope. And then take measures to cover your finderscopes lens if you have one. Never point your telescope directly at the sun without a solar filter, you can damage the telescopes optics by doing this. Also Never directly observe the sun through any optical instrument that does not have a solar filter fitted, it will do irreversible damage to your eye and for even the shortest of exposure’s it can very easily blind you in whatever eye you choose to expose. Observing at night: When observing at night it is important to dress warmly, especially on cold nights. Maybe even invest in some warm thin gloves that would still allow you to handle delicate controls if necessary. As the telescope gathers the most amount of light it is also important that your eyes can take in and focus all of that light. To make the best possible use of any light your receiving your eyes must be fully dark adapted. Basically you want your iris to allow the most amount of light through your eye to your retina. While not viewing an direct source of light this will then allow the cones and rods to adapt and be more sensitive to light, it takes about a half an hour for your eyes to become almost fully adapted in the dark. When this occurs you are about 1 million times more sensitive to light than you are in bright daylight so any bright sources of light will not only undo it but it can strain your eyes and hurt sometimes. If you need a source of light for whatever reason its best to use a red light, some automotive stores may carry small ones for your keychain which facilitate finding the keyhole in your car door at night. Observing a full moon through a high quality telescope can be quite a strain on your eye, you can get lunar filters for your eyepieces though. Many filters are actually available both lunar and planetary. These allow you to focus on different details. You can make use of your peripheral vision while observing something through an eyepiece, the centre of your eyes is less sensitive to faint light than the periphery of the eye's retina. Making use of this is referred to as averted vision. Where you can avert your vision and look out the corner of your eye at what you want to observe on the eyepiece. This will allow you to observe fainter objects that the untrained eye wouldn’t so easily pick up. Planetary Observation: The best bit of advice i can give you if you want to observe planets with the best details possible with your equipment, is keep track of alignment or near alignment times. Different planets have different orbits around the sun, and go around at different rates, for example a mars year is equivalent to about 687 earth days. so it takes 687 days for mars to complete one full orbit of the sun. An amazing time in recent years to view mars through a telescope was august 2003 when it made its closest approach in about 60,000 years. it came within about 56 million km of earth. Currently at the time of this post mars is probably over 90 million km away from earth due to its orbit, it is just about tailing us now. we are still on the same side of the sun but we are rapidly moving away from mars. Here is a link that contains an animation that best explains mars and earth alignment: http://www.windows.ucar.edu/tour/lin...ars_orbit.html I will update this thread as i think of any more usefull information |

|


|
12-19-2007, 06:55 PM
|
#2 |
|
|
Thanks for this excellent guide!
I have always been very interested in astronomy, I just need a kick up the backside to get started. Maybe this will do the trick! 
|
|
|
|
12-19-2007, 10:44 PM
|
#3 |
|
|
I bought a Skywatcher off a friend recently for £80, its this one...
.jpg) But mine is in Black and has "helios" on the side. It also had 4 lens with it, a 6.5mm, a 10mm, a 25mm and a 2x Barlow lens (what the hell is this for? ). I took some pretty good shots of the moon, just holding my K800i upto the back of the telescope, but I'm having real problems getting any sort of pictures of the moon when using my new Fujifilm 6500fd.  I probably need an adapter of sorts, but haven't been able to find one that meets my needs, it needs a 58mm thread fitting, I think!!  I've also tried using the 6500fd on a tripod setup to sit right behind my telescope, but the pictures were terrible. would love to get this working right. |
|
|
|
12-19-2007, 10:53 PM
|
#4 |
|
|
Sweet, I was into astronomy when I was a kid, but lack of funds for a decent telescope and, more importantly, lack of a clear sky drove me off the path.
Someday though, I'll get a reflector or catadioptric for their larger apertures...but I so want a Televue refractor since I've liked them for the longest time. |
|
|
|
12-19-2007, 11:01 PM
|
#5 |
|
|
Anyone looking to pickup a Newtonian reflector should in my opinion not get one that is less that 6 inches in diameter, and ideally be 8+ inches.
I feel the need to add this because it seems each year many people buy small scopes and get a little dissapointed at what they see... Most 4.5 cheap supermarket bought reflectors will not show very many details at all, but that said with a 4.5 inch scope you will (under good viewing conditions) get to see... Mars - noticable as a small orangey/red disc, no details to note but possible to see a polar cap when at its closest to us. Saturn - You will see Saturns rings but you will not be able to distinguish the individual rings apart, you will know it is Saturn only because it is a very small disc with a ring around it. Jupiter - You will see Jupiters storm (red spot, but it will appear as greyish) and the disc will be a decent size in your eyepiece, but detail will be quite minimal. Venus - You can see this with a decent pair of binoculars and is perhaps viewed this way, due to its close run with the sun, extreme caution must be taken ofcourse. In regards to galaxies, clusters other planets etc... you really need a bigger scope, at least 6 inches, 8-10-12 are obviously all better but also more expensive, the main rule is get the biggest that you can afford, the bigger the reflector the more you will see, whether that be in detail, colour or size. PS: nice guide. |
|
|
|
12-19-2007, 11:54 PM
|
#6 |
|
|
I have a Meade ETX90. It's nice, automated. I never use it though. It was a whimsical purchase because I thought I might use it a lot if I had it, but I rarely do. The wife and I check out the moon or Mars on occasion, but little else. My daughter will probably want to use it once she gets old enough though...
|
|
|
|
12-20-2007, 03:00 AM
|
#7 |
|
|
Yo Slade,
I know that in general, larger apertures are better, but also, I know I hate to move large bulky things around - the last thing I need is to make it a chore to look at the sky if I'm to get into astronomy. So, the question: What do you think of the Televue 76? It's a tiny little thing that I think would suit me...I'm probably gonna start with the planets and the larger objects in the night sky. Also, recommended eyepieces? |
|
|
|
12-20-2007, 03:27 AM
|
#8 |
|
|
Couple of very minor corrections. Light scattering in the atmosphere (specially Rayleigh scattering) is dependent on the size of the wavelength to the particle size that the light has to pass through: if they are equivalent, then the waves are scattered. Nitrogen molecules scatter blue wavelengths, with larger molecules and small dust particles in the lower atmosphere scatter green and orange. This is why the Sun looks red near the horizon, not because red light isn't as easy to scatter.
Diffraction isn't the same as scattering, and the former is dependent on the size of the aperture to the wavelength observed. Thus all telescopes suffer from diffraction but it's less of a problem for reflectors, as they tend to have larger apertures and optical components than reflectors. However, mirrors do cause spherical aberration (if their curvature is spherical, of course) and other optical errors due to the nature of reflection off curved surface. Most catadiotropics are free from spherical aberration - chromatic aberration is purely a "lens thing" (due to the refraction being wavelength dependent), and cheap catadiotropics can suffer from this if they have poor quality corrector plates. On the matter of recommendations, which is obviously a personal and subjective thing, I would suggest that total beginners go with a refractor telescope on an alt-azimuth mounting, rather than a reflector on an equatorial or Dobsonian mount. Beginners are likely to store their first telescopes in all kinds of locations and move them about considerably, in and out of different storage and usage environments - refractors are more robust to this treatment than reflectors. Alt-azimuth mounts are also easier to use and are more intuitive than equatorial mounts, something I learnt from teaching basic astronomy for over 13 years. 
|
|
|
| Reply to Thread New Thread |
«
Previous Thread
|
Next Thread
»
 Linear Mode

| Currently Active Users Viewing This Thread: 1 (0 members and 1 guests) | |
|
|

